Setting up home wireless network can be done in just a few steps. Setting up home wireless network can give your home the ability to be online from anywhere in the house. There isn’t a need to search for wires and long cord. You can attach your printer and other devices to your home wireless network after setting it up. The directions below will give you details on setting up home wireless network.

1. Ensure you have the following pieces of hardware:
- A wireless router
- A wireless network adapter for each computer
- A cable or DSL broadband modem
- Two ethernet cables
2. Connect an Ethernet cable between the WAN port of your wireless router and the Ethernet port of your modem.
3. Connect another Ethernet cable between the Ethernet port of your computer and one of the LAN ports on your router.
4. Turn on all hardware and ensure that you have internet access. If not, check the connections.
5. Open a web browser, and browse to your router’s default address to configure it. Check your router’s documentation to obtain this address. For a Linksys router, the address is:
- 192.168.1.1

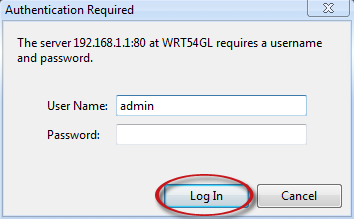
6. It’s not always necessary for setting up home wireless network, If required, log in using your router’s default login credentials. Check your router’s documentation to obtain these credentials. For a Linksys router, the credentials are:
- Username: admin
- Password:
7. Set Wireless Network Mode to Mixed and set Wireless Network Name (SSID) to your name of choice. For a Linksys router:
- Click the Wireless tab
- Select Mixed from the Wireless Network Mode dropdown
- Input your name of choice in the Wireless Network Name textbox
- Click Save Settings
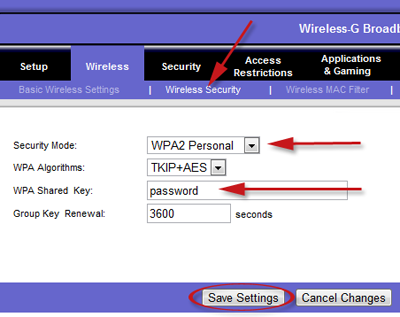
8. Set a unique password for your wireless network. For a Linksys router:
- Click Wireless Security on the submenu
- Select WPA or WPA2 from the Security Mode dropdown
- Input your password of choice in the WPA Shared Key textbox
- Click Save Settings
9. At this point, router configuration is complete. Disconnect the Ethernet cable from the Ethernet port of your computer.
10. To connect to the wireless network, ensure that you wireless network adapter is on and:
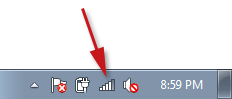
- In XP, right-click the wireless network icon in the System Tray and select View available wireless networks
- In Vista, right-click the wireless network icon in the System Tray and select Connect to a network
- In 7, click the wireless network icon in the System Tray

11. Choose the correct wireless network from the list that appears.

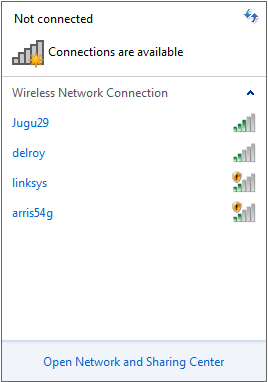
12. Type in the network password, and click OK/Connect
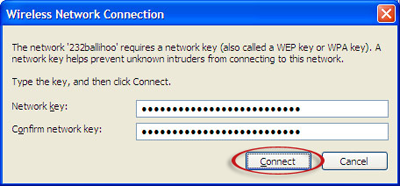
13. If the password is correct, you should now be connected to the wireless network.
You’ve finished! So setting up home wireless network at home was easier than you could have imagine. You are now secure to use your wireless connection with ease.After setting up home wireless network connection, speed up your connection with this tutorial
Popular Articles
Best Registry Cleaner
4 WAYS TO SPEED UP YOUR PC
Fix a Slow Internet Connection
Speed Up Internet Videos